One of the most common ways to leverage web cache is by using plugins. So, in this section, we’ll show you how to clear cache using three popular WordPress caching plugins. Make sure you’ve installed and activated the plugins beforehand.
Clear Cache with WP Super Cache
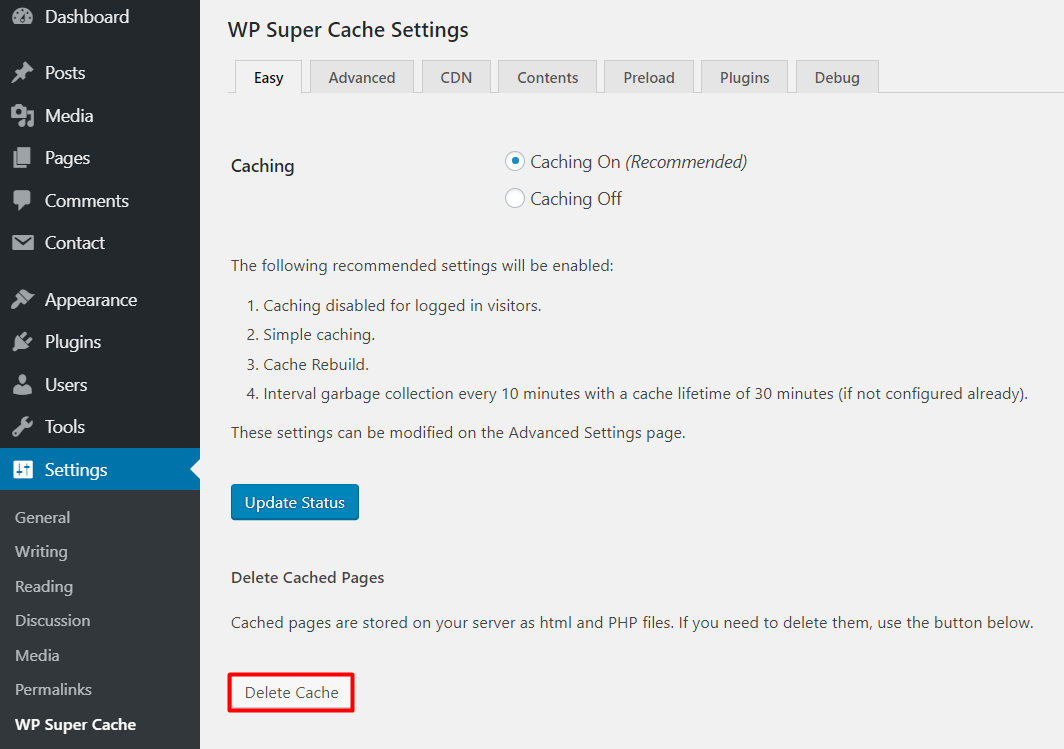
 WP Super Cache is one of the most popular caching plugins. It has a wide array of caching features – including cache scheduler and automatic cache compression. With this plugin, you can clear cache files by following these steps:
- From your admin dashboard, go to Settings -> WP Super Cache.
- Press the Delete Cache button located under the Delete Cached Pages section.

Clear Cache with W3 Total Cache
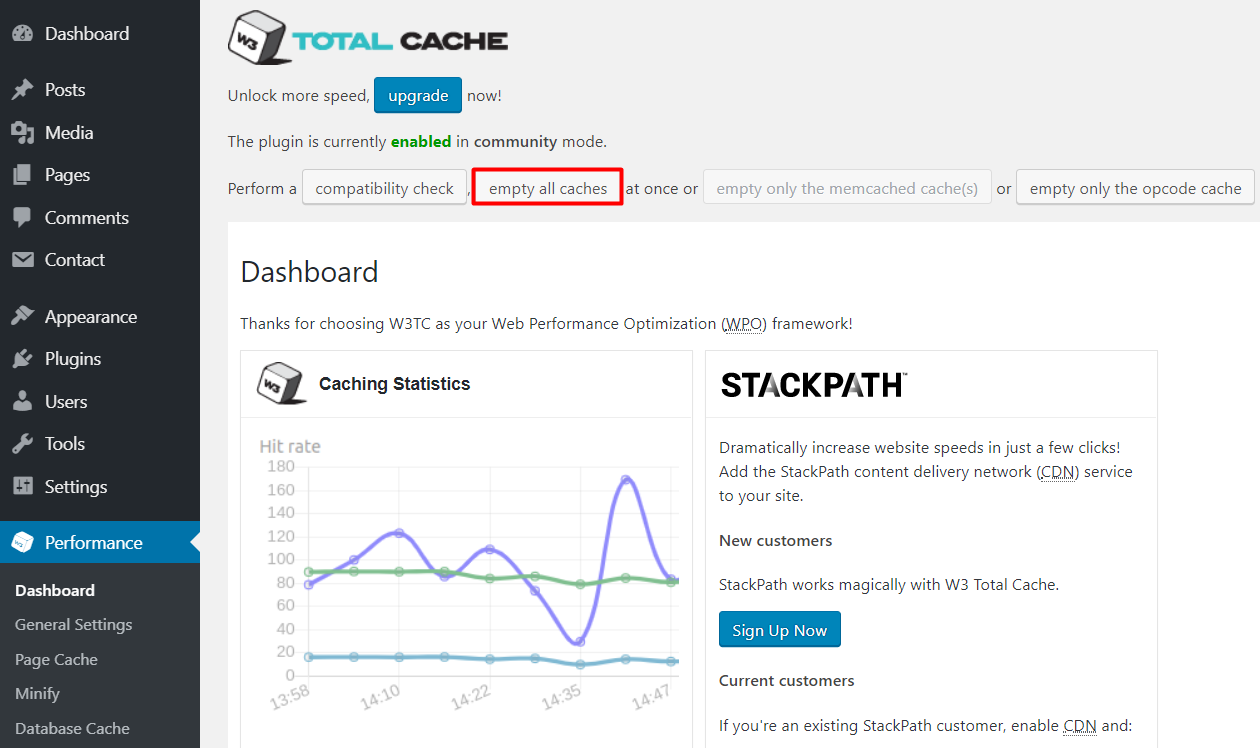
 W3 Total Cache is known for its customization and bandwidth-saving features. Popular blogs like Mashable also use it. Here’s how to clear WordPress cache using this plugin:
- Navigate to Performance -> Dashboard from your WordPress admin area.
- Click the empty all caches button located at the top of the page.

Clear Cache with WP Fastest Cache
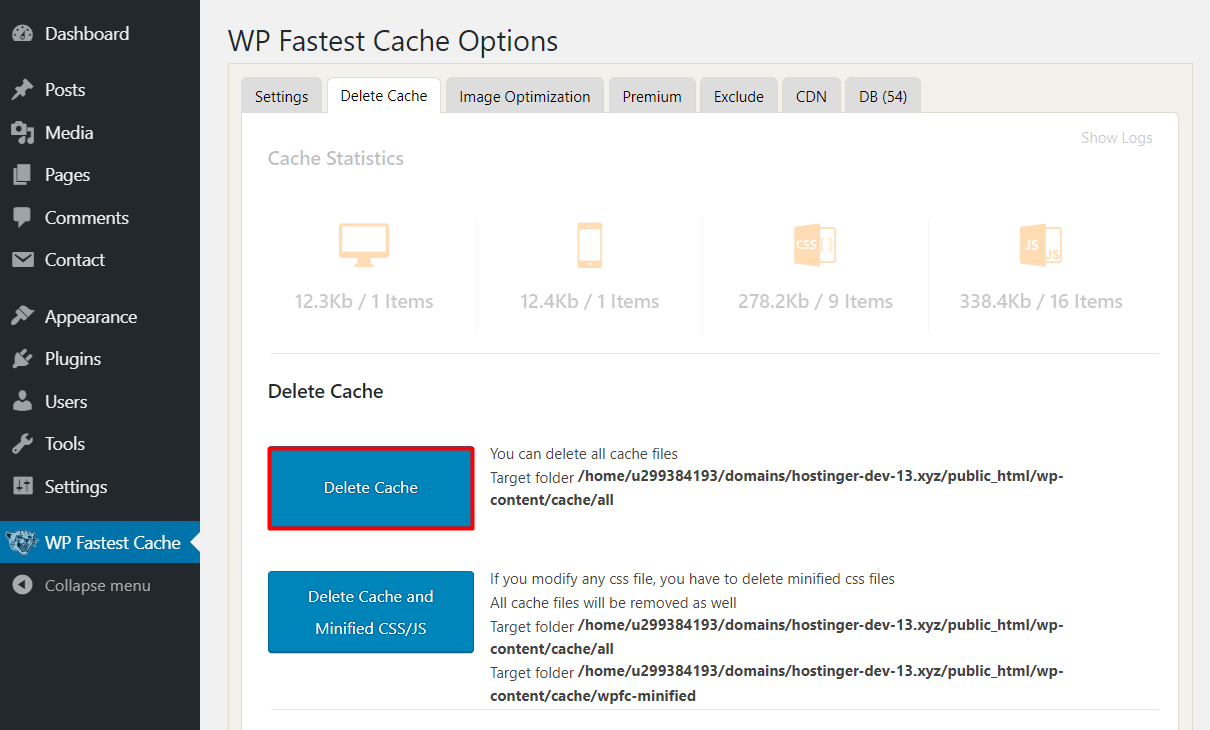
 WP Fastest Cache is another popular caching plugin known for its variety of features and intuitive dashboard. When you publish a new page or post, this plugin will delete all cache files. But just in case, you can manually delete them:
- Access your WordPress dashboard.
- Go to WP Fastest Cache and select the Delete Cache tab.
- Press the Delete Cache button.

Summary
Caching is a great way to improve site performance. However, an outdated cache file can prevent you and your visitors from seeing the updated version of the website. In this tutorial, you’ve learned how to clear the WordPress cache using three popular caching plugins.
If you still cannot see the changes made to your WordPress site, try deleting your browser cache as well.

