Do you own an iPhone and you are wondering how you can add a signature either text or image?
You are in the right place
Here you are a simple step-by-step guide to help you create an iPhone email signature with a picture that will be displayed correctly.
Before adding an image to your email signature on the iPhone, make sure your email client supports an HTML-based signature.
Step 1.
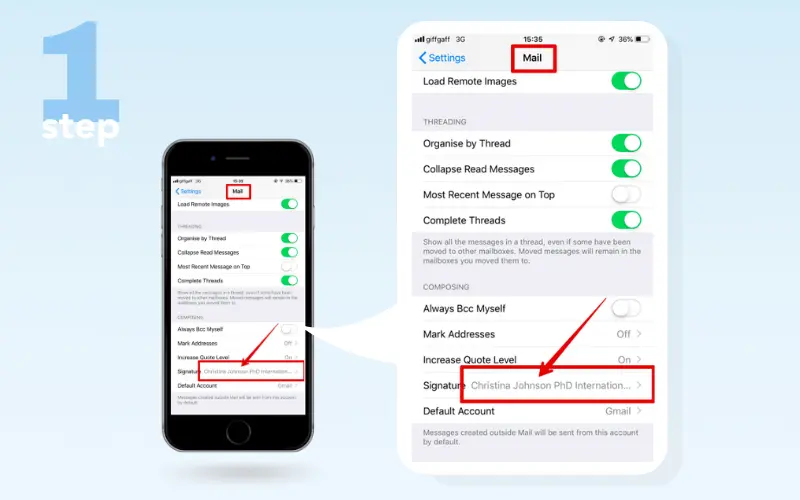
Go to ‘Settings’ on your iPhone, scroll down, click on ‘Mail’ and open the ‘Signature’ field at the bottom of a window.
Step 2.
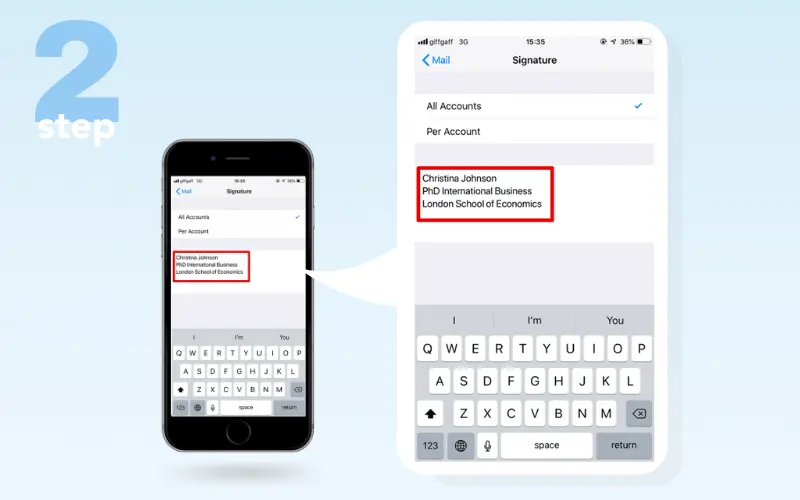
If you still don't have a signature, then create one. You can use an email signature generator and create a signature with a picture online unless you want to add a picture to the email signature manually.
In case you still want to add a picture to an existing signature, go to step 3.
Step 3.
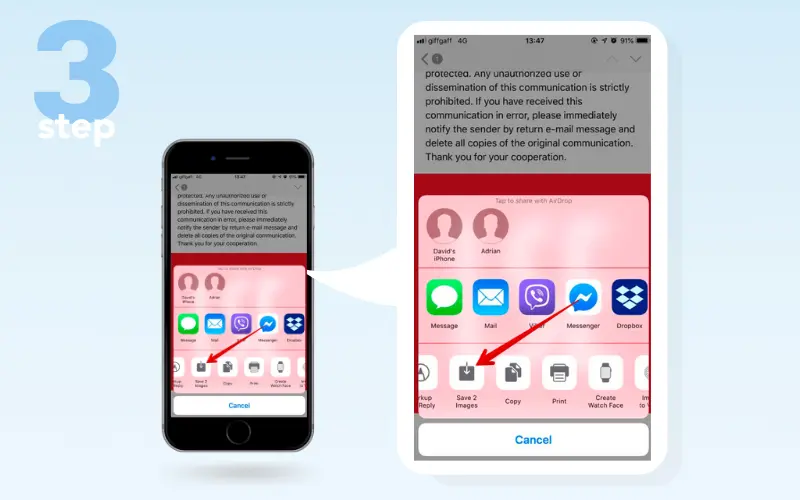
Make sure you have a relevant picture on your iPhone ready to use. Send it with a blank email to yourself ahead or save it directly to a photo album from the Internet.
Step 4.
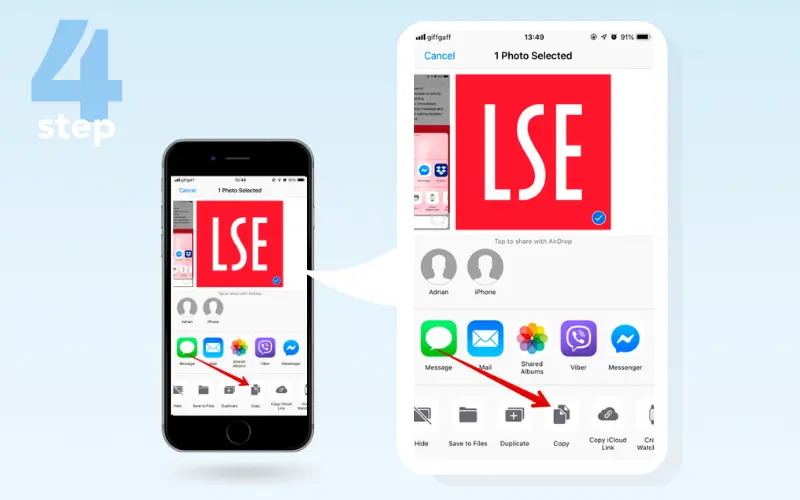
Find a picture you would like to add to your iPhone email signature and copy it (tap and hold the image, then click ‘Copy’ in the context menu).
Step 5.
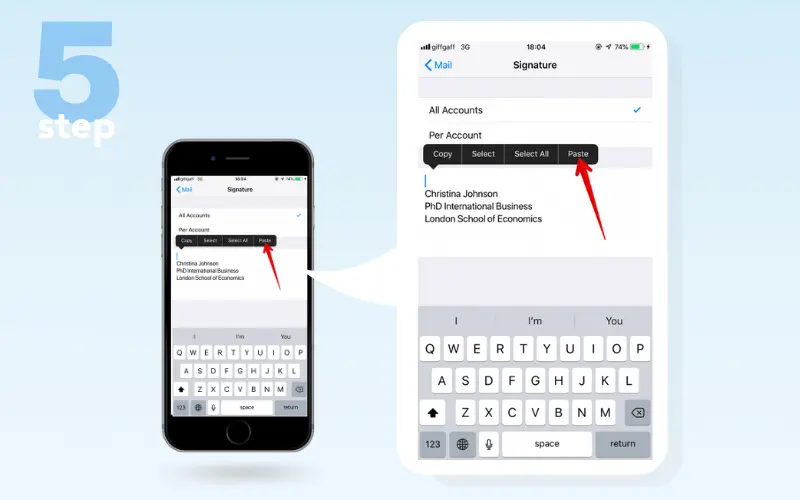
Go back to your iPhone email signature editor (‘Settings’ -> ’Mail’ -> ‘Signature’) and ‘Paste’ the picture you have just saved. Note, you will not be able to resize an image in the signature editor, so you would need to do it before to match the mobile version of your iOS email signature. The best-recommended dimensions are 320 px wide with a file size under 50KB.
Step 6.
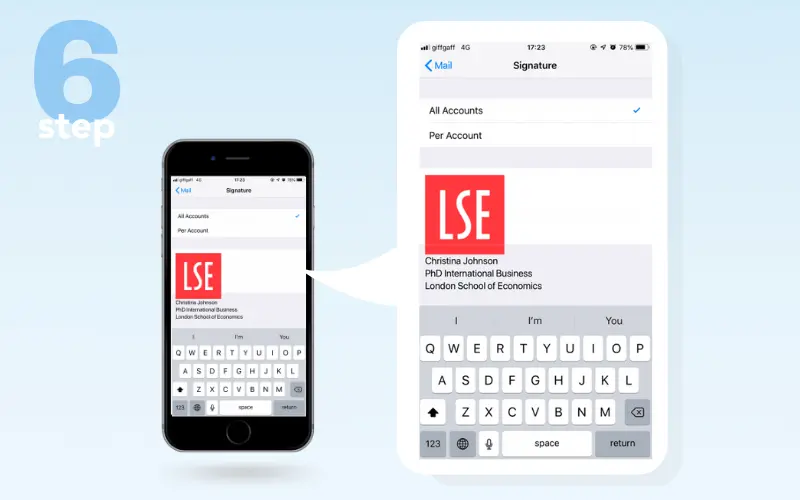
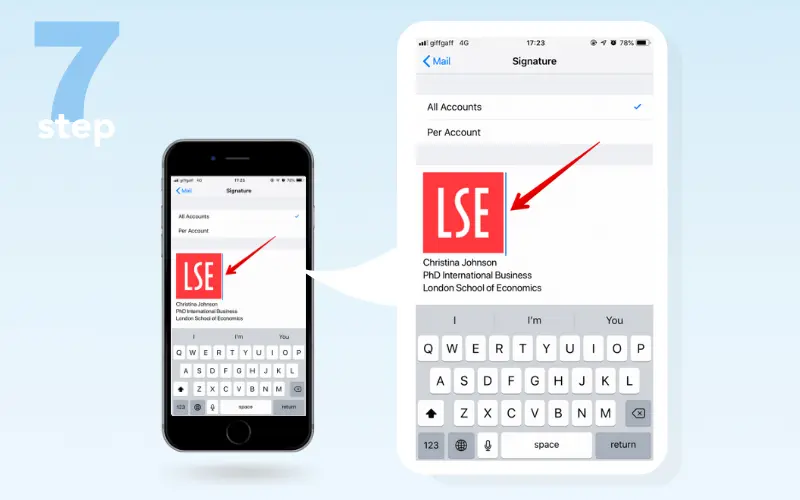
You might notice a grey area around your newly designed signature after you insert an image. To get rid of it, type in an extra space after the picture, and the grey area will disappear.
Step 7.
Your iPhone mail signature is ready to use now. Changes are saved automatically. Click on ‘Mail’ in the top left corner, and do not forget to test the signature in an email on your iPhone mail app.
Hongera sana (Congrats) !

